| « back | |
| Inserting Images | |
Most of the images on your site will be located in your "galleries", however you might want to add images into other locations on your site. Images can be added to any location that can be edited with a Rich Text editor. STEP 1. To start you will need to upload an image to one of your galleries and then get its URL. (it is ok to upload images into "hidden" galleries that can not be seen by visitors to your site). STEP 2. Copy the Image URL which is displayed on the "Edit This Image" page (about half way down). It will look something like this: http://arthives.com/files/1003/20051192823523_11.jpg Make sure you copy the whole URL from "http to .jpg" otherwise it won't work. STEP 3. Go to the Rich Text Editor where you want to insert your image. STEP 4. Click the spot in the Rich Text Editor where you would like the image to appear. STEP 5. Click the "insert/edit image" icon - the little green tree (see image below).
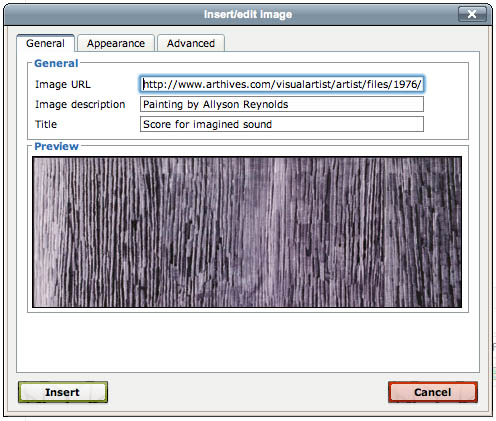
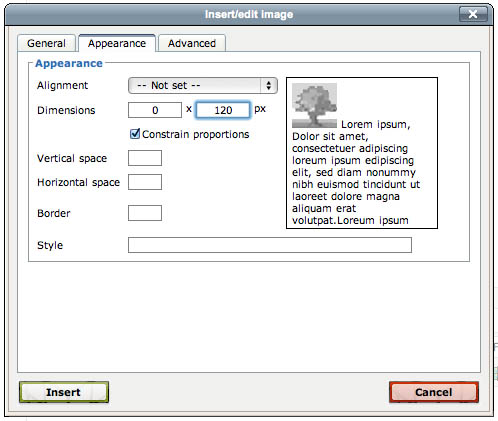
STEP 6. In the popup box, Paste your Image URL (from step 2) into the "Image URL" field. Its best to also type an image Description and Title into the other 2 fields. STEP 7. * Next click the "Appearance" tab and enter the display "Dimensions". STEP 8. Click the "Insert" button which will close the pop-up window. STEP 9. Don't forget to Click the "Update" button at the bottom of the page to save changes.
*Step 7 is only necessary if you want the image to display at a different size than the actual size of the image you uploaded. You will only need to enter the width or the height if you leave "Constrain Proportions" checked on. If you are inserting an image to use on your Galleries index page, try setting the height to 120px.
|

